I have been having a lot of great responses and recommendations about my writing lately and many people asked me to go through the basics too. Like, before I can talk about all the light, why don’t I talk about how the camera works, and how to choose the parameters. So, today we will do exactly that.
First I want you to adopt these two simple models. They are not perfect in a way that they don’t mention all aspects of the process physically speaking, but they really will allow you to develop an understanding of parameters.
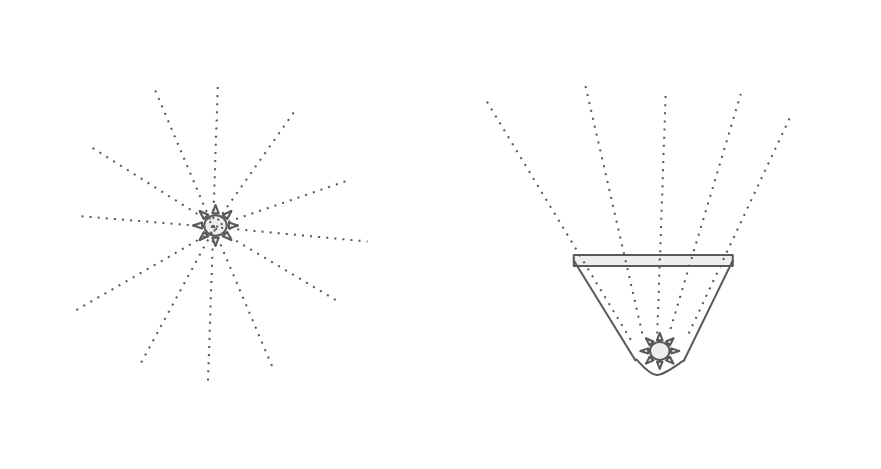
So, let’s think of light sources as those light “sprinklers” that constantly exude little weightless drops of light — photons. Like so
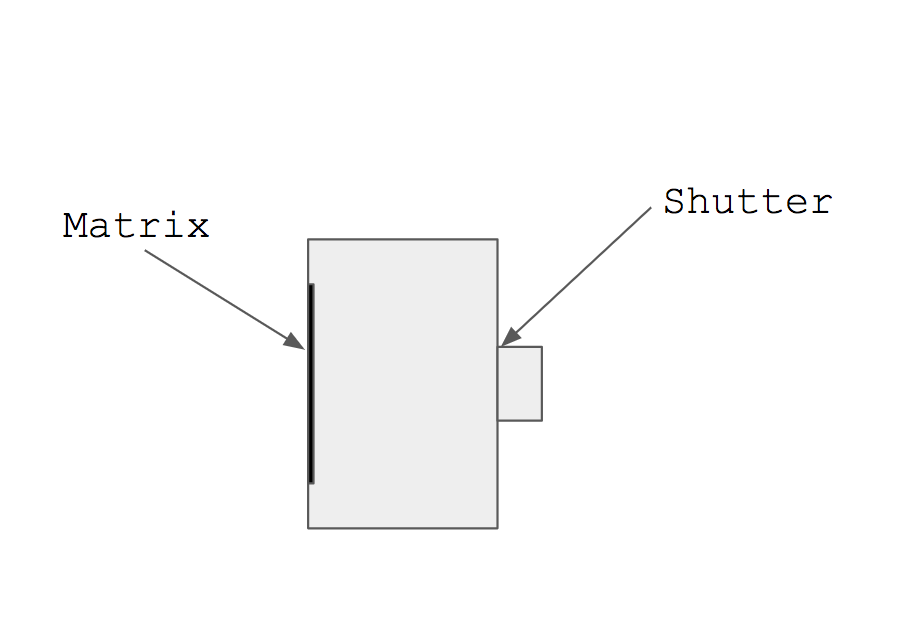
Let’s think of the camera as a box. At the further wall, we have a sensitive element — film or matrix, before the element we have lenses that focus the light and between them, we have a shutter.
The shutter opens when you press the button and stays open for a short period of time. That’s exposure. If you close the shutter very fast not a lot of light will be able to get in so the picture will be dark. If you hold it open for too long, you will have a lot of light, but if the object (or camera) is moving, you will have the light “snapshots” that will contradict each other — at the beginning, we form a picture with an object in one place and at the end, the object is shifted, so in total it’s a bit here and a bit there — it’s blurred.
Next, you can have the aperture wide open or open just a bit. The wider you open the aperture, the more light will get in with the same exposure. At the same time, the more you open the aperture, the bigger part of the lens is exposed, and not all parts of the lens are created equal. In fact, the further from the center, the worse your lens does its job. So if you open the aperture too wide you will have a small depth of field — parts of the picture that went through the center is sharp, but the parts that went through the periphery are not.
Now, imagine that the same amount of light got to the sensitive element (matrix for digital). If the element itself is very sensitive, even a bit of light will be enough to produce a picture. At the same time, the element will react to noise and the picture will be grained. If the element is less sensitive, it would take much more light to capture stuff, but it will ignore the noise. Except for the noise part, you can imagine it as with person’s skin — sensitive fair skin will get red fast and tan skin is under the same sun will stay ok. The sensitivity of the camera is called ISO
Now that we understand each element, we can say that:
- When it’s not enough light we need to make exposure longer, open the aperture, and make ISO bigger
- When it’s bright enough and we want to make a picture as sharp as possible, we use small exposure, small ISO, and close the aperture to only use the perfect part of the lens
In numbers, as a fashion photographer, shooting in twilights and relying on moody smushed effect to look appropriate, I would go with exp = 1/80 of a second (It will show you just “80” in your controls). That’s using a stabilizer, but with a model that moves a bit. I would open the aperture to 1.8 (this number is actually inverse: bigger number = smaller opening) and would bring ISO all the way to 1000. It will be a bit blurry, and mysterious, but still good enough to use in a magazine or as a small exhibition print.
If I want to be sure to have everything sharp and I work in the studio, so I can afford light to be as bright as I want, I would do for exp = 1/300, aperture at least 12 (but in some cases I will need up to 20) and ISO of 100.
Was this helpful?